This article is more than 1 year old
The Sandy Bridge Hackintosh
Run Mac OS X on Intel's new Core i
The Installation
First you need to visit your machine's Bios settings to ensure there's nothing there to frighten away Snow Leopard. Switch off any Pata functionality, set HPET (High-Precision Event Timer) to 64-bit, and make sure that AHCI (Advanced Host controller Interface) for SATA devices is enabled. Set the boot priority to CD/DVD, and disconnect all hard drives except the installation target, which is recommended to be on Sata 0.
Another tip is to have no more than 4GB of RAM in the system for the installation. You can always add more once the installation's done.

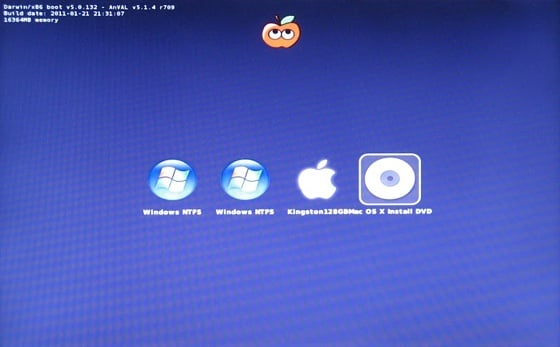
I didn't take my own advice to disconnect other drives. iBoot has detected a couple of Windows partitions as well as the target Apple drive.
At this point if you just stick in the Snow Leopard distribution disk you'll have no luck. The trick is to prepare a bootloader CD that sets up the correct EFI environment, then swap that mid-boot for the official Apple disk. I first tried the iBoot bootloader from Tonymacx86's web site.
It didn't work.
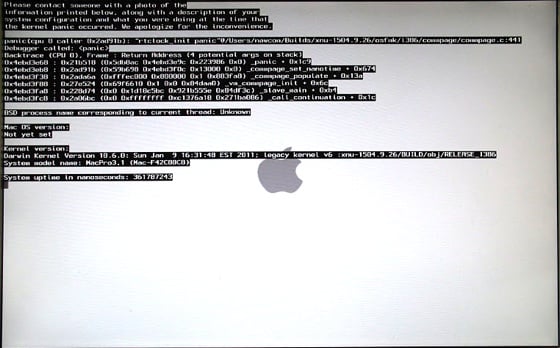
Booting with the standard iBoot disk resulted in a "kernel panic" that sprays the screen with arcane failure reports. The standard kernel is known to fail with Sandy Bridge - it doesn't recognise the CPU. But any sufficiently interesting problem in the open source community gets solved, and work from open source codesters nawcom, Anv, Azimutz, qoopz and others has provided an alternative kernel, the "legacy kernel", that will run on a wider range of processors and motherboards - including the new Sandy Bridge.

There's no mistaking a kernel panic at installation time. Subsequent KPs may be more inscrutable, merely informing you in multiple languages that you need to reboot your machine.
Tonymacx86's alternative "iBoot Legacy" disc includes this legacy kernel, and this time I achieved lift-off. The boot screen appeared and I swapped out the iBoot disk for the official Snow Leopard installation disc. Hitting F5 refreshed the screen, and when the Snow Leopard disc showed up I selected it, hit Return... and there, after much whirring of the DVD, was the official Mac installation Welcome Screen inviting me to choose my language.
Getting to this point means the installation disc feels at home with your hardware. Niggles may subsequently arise over what kexts will work, and some kexts may even panic your system. But these are details. The basics are solid. You'll find the full steps for using either of the tonymacx86 boot disks here.
