This article is more than 1 year old
LOHAN's handsome young autopilot springs into life
Pixhawk, lights, Picam, action
It's been a couple of weeks since the Low Orbit Helium Assisted Navigator (LOHAN) team took delivery of a brand-spanking new 3D Robotics Pixhawk autopilot for the Vulture 2 spaceplane, and we've now whipped out our original ArduPilot Mega (APM) 2.6 and hooked up the new kit for a quick test.
Here's the Pixhawk up and running while we attempted to work out just where all the bits and pieces are going to sit...

...and here's the same snap with a few parts marked for those of you not acquainted with the autopilot:

- LiPo cables
- Radio transmitter
- Power module
- Pixhawk
- Buzzer
- GPS/compass
- Safety switch
- Canard servos
With the beast powered and transmitting via the 3DR radio set, we were able to confirm a comms link to the flight planner software, which in turn told us all was well with the autopilot, GPS and compass:

The radio hook-up is essential for our purposes. If you cast your eyes over this fetching portrait of the naked Vulture 2...

...you can see that the avionics bay has an upper lid, the rear of which forms part of the bayonet joint attaching the nose to the rear fuselage/wing assembly.
That's a tight fit - as indeed it should be - so once the lid's on and the aircraft's assembled, it's a real faff dismantling everything to get at the avionics.
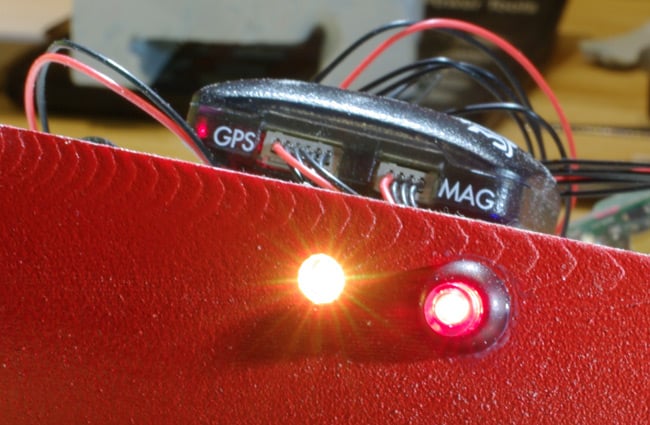
Accordingly, a couple of things needed to be outside the aircraft, namely the Pixhawk safety switch and its amazing technicolour LED dreamlamp. The former is what you press to enter a "ready to arm" state once the autopilot's fired up. The latter indicates autopilot status.
Handily, 3DR had promised customers an external LED for just such circumstances, and kindly sent over a hot-off-the-press example so we could get down to business. These snaps show more of of our provisional kit layout work earlier in the week (including a first fit of the Raspberry Pi Model A and heroic Playmonaut), and the LED and safety switch attached to the fuselage:

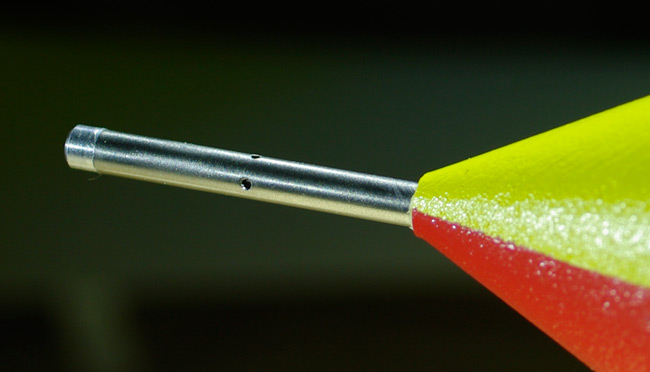
Also in the box was an airspeed sensor kit, which took a bit of wrangling into the Vulture 2's pointy beak...

...and a nerve-wracking nose job to create a nostril though which to pass the air-sucking proboscis:
With all that boxed off, the moment arrived to install the Picam for the aforementioned Raspberry Pi, which will be handling mission photo/video duties.

The camera peers out from the underside of the aircraft's nose, meaning that its view will be more or less horizontal during ascent and launch phases, when the Vulture 2 will be slung at an angle of 20 degrees from vertical on the fantastical flying truss. Trust us, it all makes perfect sense.
The Pi will also have a Radiometrix NTX2 transmitter to dispatch live images earthwards, GPS unit and accelerometer. It's all tried-and-trusted stuff, courtesy of Pi-in-the-sky guru Dave Akerman.
So, we're currently attempting to assemble a 3D jigsaw puzzle of avionics in such a way that stuff is solidly mounted, but also accessible should the need arise. As an example, the Pi will sit above the canard servos, but has to be whip-out-able if the servos require attention.
In addition to what we're already fettling, we have to throw into the mix some Styrofoam insulation, the extra Pi bits, R/C receiver, batteries for both Pixhawk and Pi, and one of Anthony Stirk's PAVA minitrackers.
Despite the tight squeeze, we have promised our beloved Playmonaut a decent seat, as is only right and proper. ®
More from the lovely LOHAN:
- You can find full LOHAN coverage right here.
- If you're new to LOHAN, seek out our mission summary for enlightenment.
- There are photos our our magnificent Vulture 2 spaceplane here, and detailed structural plans here.
- For your further viewing pleasure, we have all our photographic material stored on Flickr.
- Our LOHAN and Paper Aircraft Released Into Space (PARIS) videos live on YouTube.
- We sometimes indulge in light consensual tweeting, as you can see here.
LOHAN - A Special Projects Bureau production in association with...


