This article is more than 1 year old
Photoshop for 40 quid: Affinity Photo pushes pixels further than most
Even creative pros are curious to try Serif's image editor
Layer, lady, layer
Affinity Photo’s Selection Brush is similar to, and as good as, Photoshop’s Quick Selection Tool. You can get a rough cutout very quickly. Then you can refine it using the Refine Edges dialog, or by painting on a red (rubylith) ‘quick mask’ overlay, or by editing a greyscale alpha channel, and so on.

The Selection Brush (left) follows the edges of features in a scene to speed up accurate selections. You can then clean up the selection using the Refine Selection (centre) dialog (like Photoshop’s Refine Edges) or by painting on it as a Quick Mask or greyscale alpha. Darkened sky following level changes (right). Click for a larger images
In the Layers palette, masks exist as layers in their own right, but are nested with the layers they clip; so their thumbnail appears to the right of the clipped layer’s thumbnail, like a Photoshop mask, when the layer stack is collapsed, but when you expand it by clicking the disclosure triangle to the left of the layer, the mask appears below, like a Photoshop clipping group.
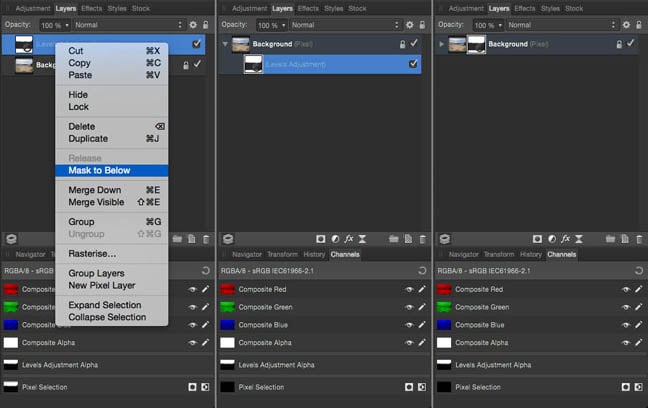
Any layer can be set to mask another, either using this contextual menu or just by dragging it to the right of that layer’s thumbnail (left). The ‘child’ layer then appears below the ‘parent’ layer in the palette, and indented (centre). When you collapse the layer to save space in the palette, the mask appears to the right, as in Photoshop (right). Click for a larger image
This is easy to get used to, and resolves the multiple logics of the layer model rather elegantly. As in Photoshop, adjustment layers don’t show their masks independently in the palette, but reveal them for editing with an Option-click on their single thumbnail.
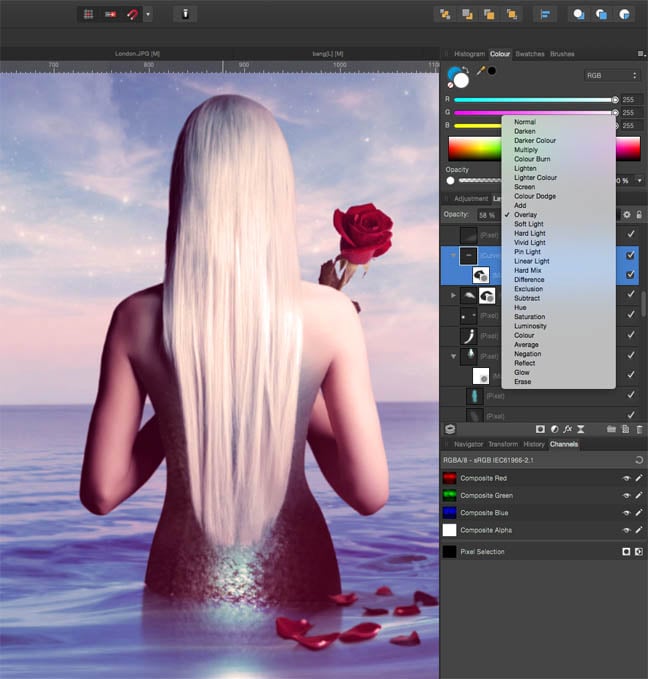
Layers can be combined using a wider range of blending modes than in Photoshop.
Spot the classic Photoshop blending mode that Serif has quietly killed because nobody’s used it since the 1990s*
The variety of blending modes (Multiply, Overlay and so on) exceeds Photoshop’s, and clicking the cogwheel icon at the top right of the palette brings up a Blend Options dialog for total control over layer interaction.
Walkin’ down the line
Although this isn’t one of those image editors that serves equally as a vector drawing app, the Pen tool is fully functional – including the all-important Option-drag for sharp corners and cursor keys to nudge nodes – and the selection of interactively customisable geometric shapes puts Photoshop to shame.
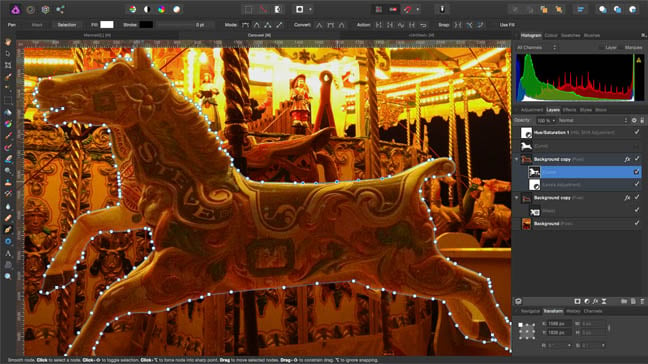
The Pen tool works exactly as you’d hope, and ‘curves’ can serve as drawn shapes or masks, but there’s no support for clipping paths as such. Click for a larger image
Both vector and pixel layers can be masks or act as masks with equal simplicity, except for one wrinkle: a path, or ‘curve’, in Affinity Photo’s terminology, must be filled before it will act as a mask.
Here the logic is less clear – any colour of fill results in the same clipping behaviour – and eliding the concept of independent paths creates some anomalies. When I clipped a pixel layer with a curve and exported the image to PSD, the layer arrived in Photoshop as a pre-clipped raster, with no curve to edit and the clipped portion of the pixel data erased.
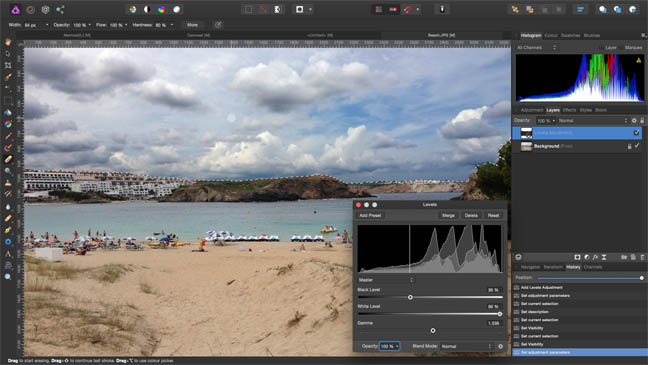
Apply an Adjustment or Effect and it’s added as a layer; do so with a selection active and the layer gets its own mask
Click for a larger image
When I saved a separate curve layer, however, I got an editable path. But there’s no Paths palette, and no way of saving an image with a clipping path, a significant omission for those of us still working in print.
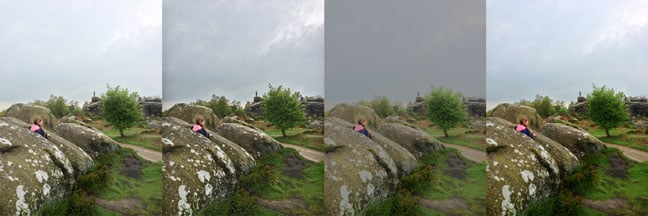
Photoshop’s Shadows/Highlights adjustment (second from left) pulls detail and tonal range out of dark and light areas. Affinity Photo’s equivalent just lightens or darkens them (third), although the Soft Light blending mode can improve the results (fourth). Serif tells me it’s working on changes to this feature. Click for a larger image
Adjustments and Effects can be quickly added as non-destructive layers, like Photoshop’s Adjustment Layers. But there’s no equivalent of Smart Objects, so you can’t apply operations such as Unsharp Mask to a pixel layer and revise them later.
A workaround is to duplicate the layer first and untick its visibility, so you can revive it later, but this is more cumbersome.
*Dissolve
